Beacon Hill Routes |
|
|
Beacon
Hill Grace Dieu Viaduct and Craglets |
THE CLIMBS The first outcrop is SUMMIT CRAG, just to the
south of the trig point, beside the track behind the wall. It is visible from
the top car park. The rock is almost white and gets the full sun. There is an obvious overhang above some big boulders
one of which forms a fine little pinnacle. From right to left are: 1 Prop 5m VD (Summit Crag) Mantleshelf up just to the right of the overhang. 2 Auto 5m HVS 5a * (Summit Crag) Climb up to beneath the overhang, above the small
pinnacle. Step right onto a large hold, back left, and then straight up. 3 And You and I 5m E2 6a ** (Summit Crag) Makes the move that Auto avoids. Climb left of the
large hold on Auto straight over the overhang with a long reach from an
undercut to gain a very small flake. Don't fall off; a hospital job awaits! S. Gutteridge, 1977. 4 Is There a Better Way 5m S 4a (Summit Crag) Start directly behind the pinnacle. Swing right over
the overhang and muscle up. 5 Marine 5m D (Summit Crag) Start about 2m left of the little pinnacle. Straight
up the lower and upper walls on big jugs. 6 Fire 5m S 4a (Summit Crag) Just left of Marine is a steep polished little wall.
Skate up the first moves and scramble to the top. 7 Shaft 5m D (Summit Crag) 5m left of the little pinnacle. Climb a rib and
continue. Almost a continuous route. Following the track north-westerly down and round
the summit for 50m leads to THE BEACON FACE, so called because of the profile
of a head can be seen from some directions. There are two climbing sections
with a broken section between. The routes on the right-hand section from right to
left, are: 8 Outside Wall 5m S 4a (Beacon Face Right) Start just right of the large boulder by the obvious
V gully. Climb the well-scratched wall on big holds without using the
boulder. 9 Right Arête 6m HVS 5a (Beacon Face Right) Climb the right arête of the V gully, either direct
or from the boulder or by traversing out of the gully. 10 Circus of Heaven 6m E1 5c * Climb the right wall of the V gully without using
the arête or boulder. S. Gutteridge. 11 V Gully 6m VS 4b ** (Beacon Face Right) Climb the V gully direct. A deceptive undertaking.
Graded Severe in the old guide when it had an extra hold. If all else fails,
turn round and face out. 12 Moonshot Direct 6m E1 6a (Beacon Face Right) The left wall of the V gully direct. Use layaways to
reach the polished jugs then mantleshelf and layback using a poor high flake
directly above for the left hand. S. Gutteridge. Cookie
Monster
E1 6a 13 Moonshot 6m E1 5b *** (Beacon Face Right) Start under the overhang on the left wall of the V
gully. Reach for polished jugs by underclings and use a pinch layaway for the
left hand to reach the obvious triangular hole up and to the left. Then
straight up. In 1978 Steve Gutteridge and Pete Meads had a bit of
a competition whenever either of them visited the Beacon. This eventually
resulted in Pete doing 21 ascents of Moonshot (some of them by the Direct in
18 minutes! No wonder it's polished. 14 On the Silent Wings of Freedom 6m E2 6a (Beacon Face Right) Start just left of Moonshot under the overhangs,
swing out on undercut holds to make a hard move out onto the face. S. Gutteridge. 15 Slippery Slabs 5m VD (Beacon Face Right) Climb up 3m left of Moonshot on good holds. 15m further left a group of overhangs with a smooth
slab below gives the next cluster of routes. Routes are listed from right to left. To the right
of its right edge is: 16 Nostril 6m VD (Beacon Face Right) (Beacon Face Left) Just right of the arête is a diamond-shaped overhang
(the nose on the face of Beacon Face) above a little corner. Start up the rib
to the right. Finish up the top wall by monster steps. Alternatively finish
up the steep corner to the right. 17 Left Nostril 6m VD (Beacon Face Left) Climb the arête with a big step in the little
corner, then follow the arete above. The other nostril. 18 Right Corner 5m VD (Beacon Face Left) Climb the corner at the right-hand end of the
overhangs to a step up to the right around the overhang. Has an incredibly
polished sloping hold and an excellent slot. 19 Hot Rails to Hell 5m HVS 5a (Beacon Face Left) Left of Right Corner lies a small corner. Climb the
left face. 20 Death Valley Nights 5m HVS 5a (Beacon Face Left) Also called Bimbo. Climb the groove through the
overhangs to the left of Hot Rails to Hell to finish direct over a small
overhang at the top. G. Rowley, Aug. 1980. 21 Limbo 5m VS 4c * (Beacon Face Left) Left of Death Valley Nights a short crack leads to
the overhang. Climb this and the overhang above. B.M and P.H. Biven, 1957. 22 To Be Over 5m E1 5c **
(Beacon Face
Left) Climb the overhang to the
left of Limbo from a recess. S. Gutteridge. 23 Balsoon 5m
HVS 5a * (Beacon Face Left) Climb the
overhang direct at the left-hand end. S. Gutteridge. The crag to the left is more broken with a slab
topped by a line of overhangs. There are several one-move middle-grade
problems over the overhangs. Because of the position they are exposed and not
good to fall from. The next two crags lie 150m down the hill to the
west. Cross the track and follow any path through the wall. The crags can
also be reached directly from the car park by taking a path to the north west
across rough ground between the two walls. The crags are in two groups. The most southerly is NUMBER THREE CRAG which
has a pair of obvious clean buttresses on either side of a deep gash. Routes
are described from left to right. 24 Starship Trooper 7m E1 6a *** (Number Three Crag) Ascend the overhanging arête left of the obvious
crack/corner line. S. Gutteridge, 7 July 1977. 25 Collywobble Crack 7m HS 4b * Climb the polished crack in the gash. Another
deceptive undertaking. 26 Third Time Lucky 7m E1 5c ** Climb the middle of the wall right of the crack
direct. No using the crack. 27 The Last Straw 7m HS 4b * (Number Three Crag) Step right onto the arête right of Collywobble Crack, and ascend. B.M. and P.H. Biven, 1957. 28 Relayer 7m E1 5c (Number Three Crag) Climb the wall right of the arête direct. S. Gutteridge, 24 June 1977. 29Ten Pin Wall 7m HS 4b Climb the wall by starting in the gully to reach a high hold and
delicately layaway to finish at the top of the left arête. 30 The Gully 10m D Climb the obvious gully. 31The Camel's Back 10m HVS 5a Climb the arête of the gully starting from the left. 32The Heart of the Sunrise 10m E1 5c * (Number Three Crag) The front face of the arête, gained from the left. S. Gutteridge. 33 Starlight 10m HS 4b (Number Three Crag) Climb the crack right of the arete direct. 34 Forest Wall 10m VD 1 m right of the crack. Up and left to the top. 35 Forest Slabs 10m D (Number Three Crag) The slabs give two obvious routes. The fourth crag, NUMBER FOUR CRAG, lies 20m to the north and
has a small face with an obvious crack to the left. 36 Jack In the Box 5m HS 4b * (Number Four Crag) Climb the obvious crack to gain a ledge on the left. 37 Silk and Satin 6m HVS 5c ** (Number Four Crag) Climb the overhanging wall on the right direct. Utterly desperate. Frottage (4a) - Climb the centre of the buttress on large footholds, instead of moving right onto the grassy ledge, climb direct by long reaches. Bowline (4a) - The right edge of the protruding block, Bow climbs the left edge. Climb direct on square-cut holds, avoiding holds on Bow and the grassy ledges to the right. Ian Waterhouse May 2004 38 Bow 4m VD ** (Number Four Crag) Climb the overhanging arête to the right. Three metres left of Number Four
Crag there is a small square cut corner. Sprint Start 5c From the starting blocks climb the
corner without using the arêtes on either side. Stephen Bennet 26/5/93 There is another crag 40m to the north but closer
inspection reveals a heap of boulders which give few routes.
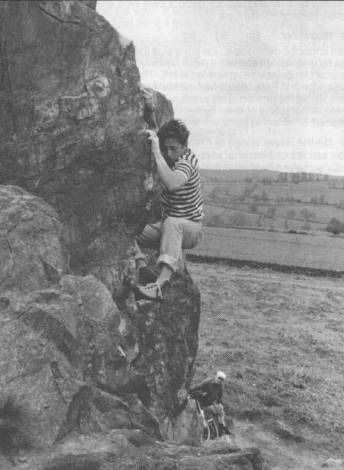
Greg Lucas on Starship Trooper (E1), NUMBER THREE CRAG, Beacon Hill |